Documentation
Jira
The Jira module connects All DashAI to Jira — bringing project issues, delivery signals and AI-powered summaries directly into wp-admin.
OAuth supported
Read-only
Enterprise ready
Overview
Jira integration connects All DashAI to your project management system, allowing you to monitor delivery status, operational signals and risks directly inside WordPress.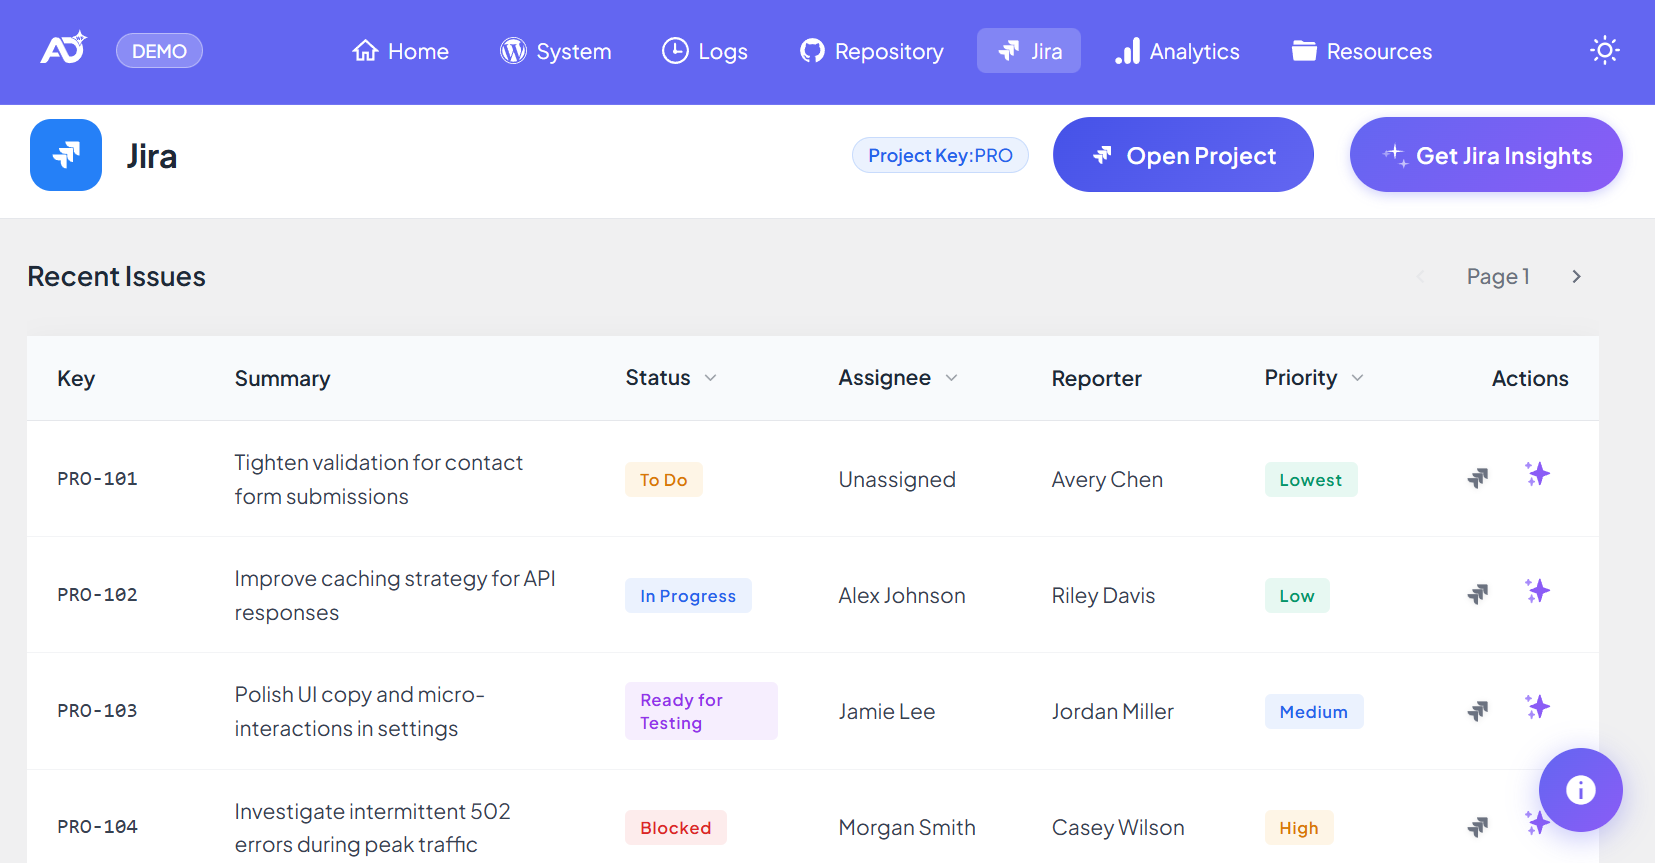

What you get:
- Live Jira issues inside wp-admin
- Project status visibility
- Normalized issue data
- Optional AI-powered summaries
What the Jira page does
1) Centralizes project visibility
- Recent and relevant issues
- Status, priority and ownership
- Direct links to Jira tickets
- Quick project health snapshot
2) Helps identify bottlenecks early
- Long-running or stalled issues
- Too many items in progress
- Critical tickets without owners
- Missing priorities
3) Generates AI-powered project insights
- Recent progress summaries
- Blocker detection
- Risk signals
- Next-step recommendations
Prerequisites
- Jira Cloud or Jira Server instance
- Jira Base URL (example:
https://company.atlassian.net) - Project Key (example:
PROJ) - OAuth or API token authentication
How to connect Jira
- Go to All DashAI → Settings → Jira
- Enable Jira Integration
- Enter Jira Base URL and Project Key
- Select authentication method (OAuth or API Token)
- Click Save
Tip: Always use the Jira Project Key (for example
PROJ), not the display name.Token setup
If you choose API Token (manual credentials), Jira uses a simple token flow — it is different from Bitbucket because Jira does not require “token with scopes”.Jira API Token (Atlassian)
- Open Atlassian token settings: id.atlassian.com/manage-profile/security/api-tokens
- Click Create API token.
- Give it a name (example:
alldashai-jira) and click Create. - Copy the token (it’s shown only once) and store it securely.
- In All DashAI → Settings → Jira, select API Token and enter:
- Jira Email: your Atlassian account email
- Jira API Token: the token you created
- Click Save and refresh the Jira page.
Recommended: Use a dedicated token just for All DashAI, and rotate it if a team member leaves or access policies change.
How Jira integration works
All DashAI queries the Jira REST API and normalizes project data for fast display inside WordPress.- Issue key and summary
- Status and priority
- Assignee and reporter
- Created and updated dates
- Direct Jira URLs
AI summaries and project insights
With AI enabled, Jira data becomes decision-ready.- Executive project summaries
- Risk and blocker detection
- Progress highlights
- Next-step recommendations
Why this matters for agencies
- Aligns internal teams and clients
- Reduces manual status meetings
- Improves delivery predictability
- Detects risks early
- Connects Jira with Logs, System and Repository
Troubleshooting
No data appears
- Check Base URL and Project Key
- Verify the user has access to the project
- Confirm you used your Atlassian email + API token (not your password)
Authentication error
- Reconnect OAuth (if using OAuth)
- Generate a new token and update it in Settings
- In enterprise environments, confirm your org allows API token access
Correct project but no issues listed
- User lacks Browse Projects or Browse Issues permission
- Project key is correct but filters/JQL restrictions limit visibility
Final result:
Jira brings project tracking into WordPress — helping teams monitor delivery,
detect bottlenecks and make faster decisions with optional AI insights.