Access Control
The Access Control module makes All DashAI secure and client-ready: decide who can access the dashboard and which sections each person can see —
without giving admin permissions and without extra plugins.
Client-safe
Per-section rules
Overview
Access Control turns All DashAI into a clean, professional dashboard you can safely share with clients. You define who can enter and what each person can see — avoiding the classic WordPress choice: “either admin sees everything or users see nothing”.
Access is based on the logged-in WordPress user’s email. When restriction is disabled, any user with appropriate WordPress permissions can access the plugin; when enabled, only users or domains you allow can enter, and only the sections you grant them.

Restriction modes
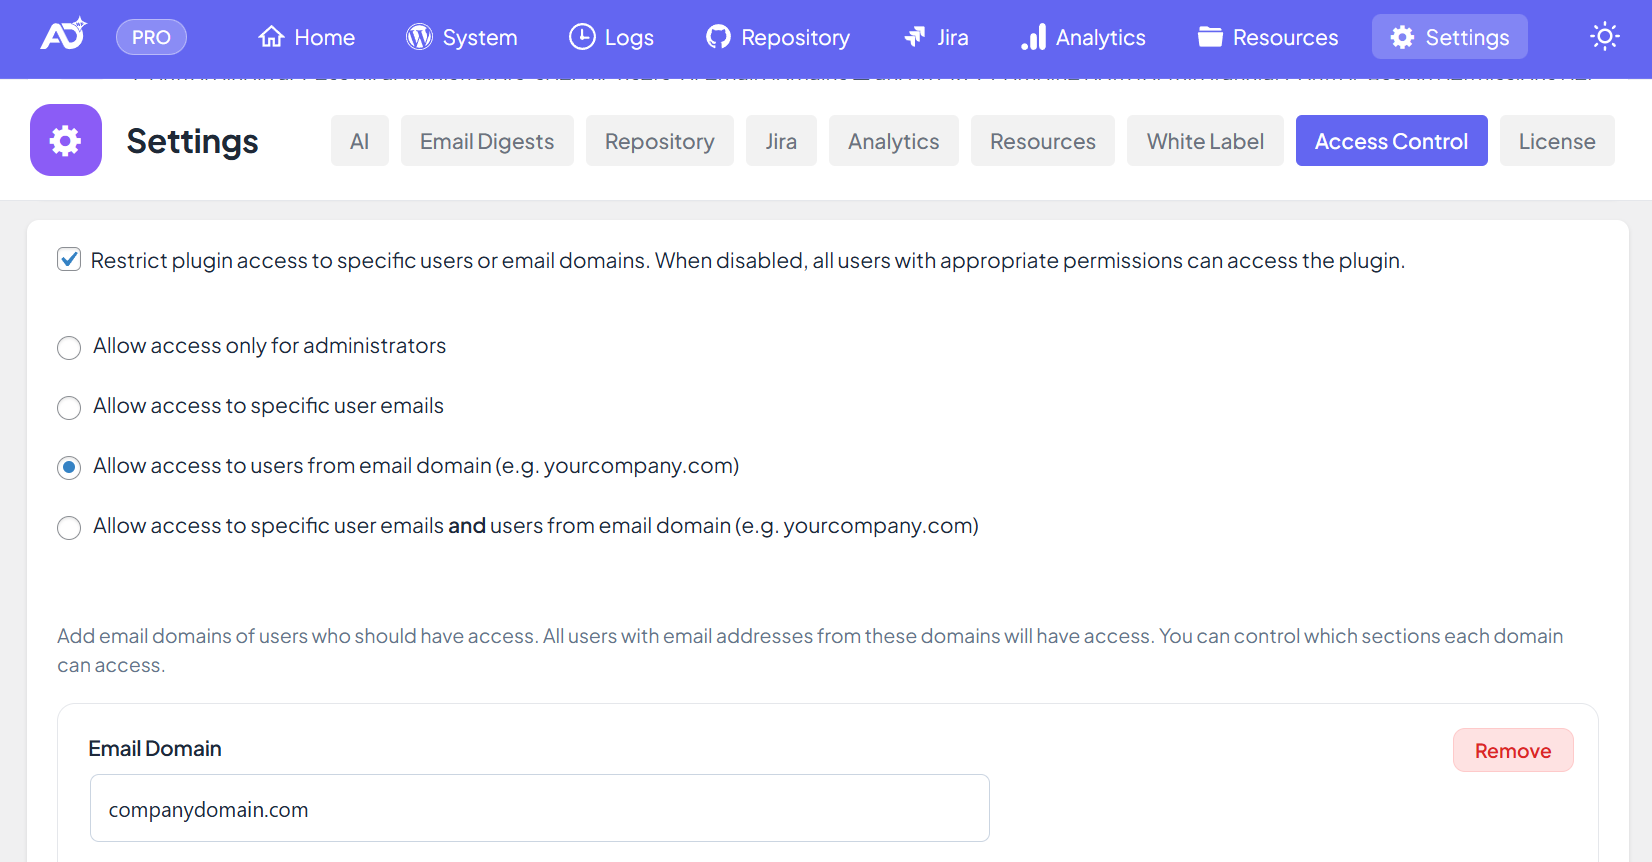
Under All DashAI → Settings → Access Control, first enable Enable Access Restriction, then choose the Access Restriction Method. Modes apply to existing WordPress users: the plugin checks the current user’s email (or its domain) against the allowlists.
- Allow access only for administrators — only users with the WordPress administrator role can access All DashAI.
- Allow access to specific user emails — list individual email addresses; only those logged-in users (matching the list) can access, and only the sections you allow per entry.
- Allow access to users from email domain (e.g. yourcompany.com) — any logged-in user whose email domain matches an allowed domain (e.g.
user@client.comwhenclient.comis allowed) can access, subject to per-domain section rules. - Allow access to specific user emails and users from email domain (e.g. yourcompany.com) — combine user allowlist and domain allowlist; a user can match either. PRO only.
When restriction is disabled, all users with appropriate WordPress permissions can access the plugin; the method and allowlists are ignored.
Per-section permissions
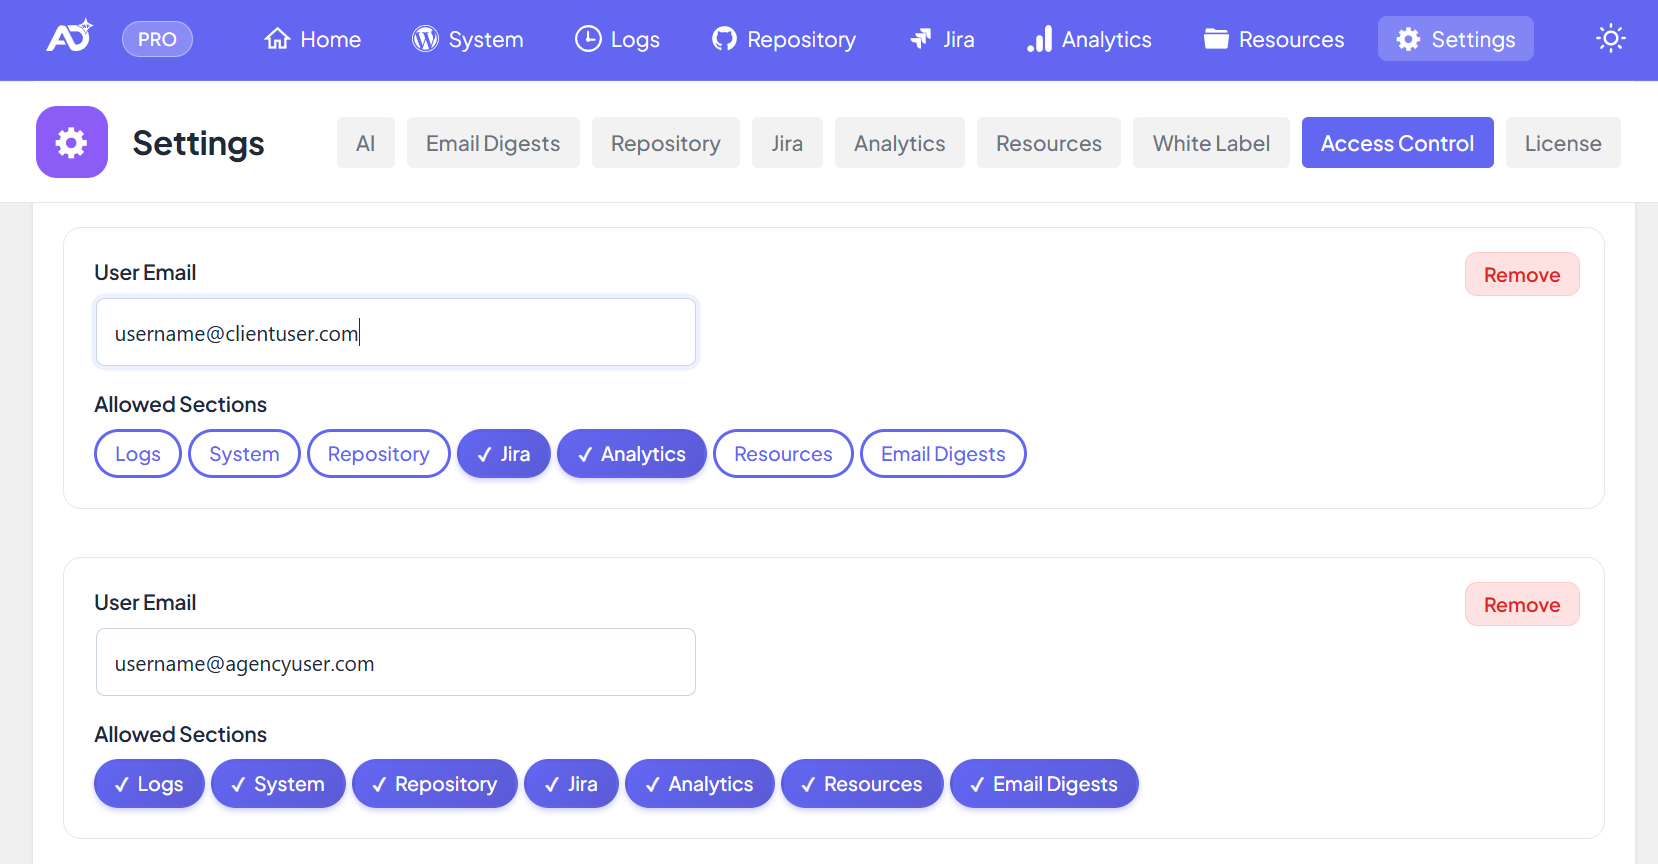
Access Control is not just “can enter / can’t enter”. For each allowed user or domain you choose which sections that entry can access. Restricted sections are hidden from the menu and blocked when opening their URL directly.

Configurable sections:
- Logs — errors and warnings
- System — health, status, key checks
- Repository — commits and deploy context
- Jira — tickets and activity
- Analytics — reporting data
- Resources — links, docs, runbooks
A user or domain must have at least one section allowed to get access; otherwise they are denied. Sections are enforced on both the sidebar/menu and direct URLs — opening a blocked section’s URL shows an access-denied message.
How to configure
- Go to All DashAI → Settings → Access Control (Settings is administrator-only).
- Check Enable Access Restriction so that only allowed users or domains can access.
- Select the Access Restriction Method: administrators only, specific user emails, email domain, or both.
- Add allowed entries for the chosen method:
- User emails: click Add User Email and enter the email of an existing WordPress user (e.g.
user@example.com). - Domains: click Add Domain and enter the domain (e.g.
yourcompany.com). A leading@is optional and is stripped by the plugin. - Both: use the separate user and domain lists for that mode.
- User emails: click Add User Email and enter the email of an existing WordPress user (e.g.
- For each user or domain row, toggle Allowed Sections (Logs, System, Repository, Jira, Analytics, Resources) so that entry has at least one section allowed.
- Click Save.
The plugin prevents you from removing your own email (in user mode) or your own email domain (in domain/both mode) from the allowlist to avoid locking yourself out.
How it works
On each request, Access Control uses the currently logged-in WordPress user and applies the allowlist and per-section rules.
- Identity: the plugin uses the logged-in user’s email (
user_email). Only WordPress users who are logged in are evaluated. - Restriction off: if Enable Access Restriction is unchecked, everyone with the right WordPress capabilities can access; method and allowlists are not used.
- Allowlist checks: when restriction is on, the method (administrators / users / domain / both) determines which allowlist is used; email or domain is matched case-insensitively. In “both” mode, a match on either the user list or the domain list grants entry.
- Section enforcement: for users/domain/both, each allowed entry has a set of allowed sections. The menu only shows sections the user is allowed; direct access to a section URL is blocked with an access-denied message if not allowed.
- Safety: administrators can always open Settings. The license owner (Freemius) always has full access in user/domain/both modes. You cannot remove your own email or domain from the allowlist.
Best practices
- Use Domain for whole client teams and Both for mixed user + domain rules.
- Keep sensitive sections (Repository, Jira, Analytics) restricted by default; grant only to trusted users or domains.
- Ensure at least one administrator keeps access so you can recover or change settings.
- Use per-section rules to build “client portal” views without exposing Logs or Settings.
Troubleshooting
User is listed but still can’t access
- They must be logged in to WordPress with that email address (the plugin does not create users).
- Ensure Enable Access Restriction is on and the correct Access Restriction Method is selected.
- For user/domain/both modes, that entry must have at least one section enabled; otherwise access is denied.
Domain rule doesn’t work
- Enter the domain without
@(e.g.client.com). If you enter@client.com, the plugin strips the leading@and usesclient.com. - The match is on the part of the user’s email after
@(e.g.name@client.commatches domainclient.com).
I lost access to All DashAI
- Log in with another WordPress administrator account. Only administrators can open Settings.
- Go to All DashAI → Settings → Access Control and either uncheck Enable Access Restriction or set the method to Allow access only for administrators to restore access, or re-add your email/domain and ensure at least one section is allowed.